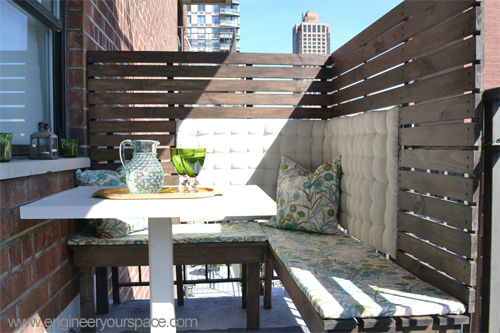
FurnishYourself.com: Does your home/office have an attached balcony or a space as small as 5 ft X 9 ft which you don’t know how to utilize? We don’t want to crowd up the place with chairs and tables, so here’s a brilliant idea to convert that space into a comfortable area with a simple wooden bench. Use this simple DIY (Do it Yourself) design that only takes a couple of hours to make using basic tools and materials.
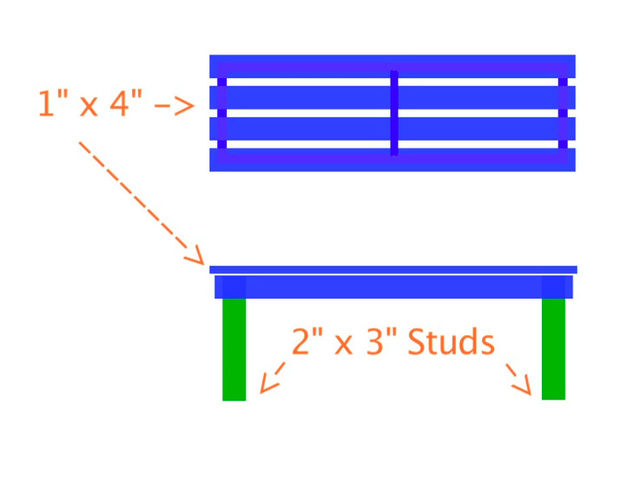
The bench dimensions are 56″ long x 16 1/4″ wide x 17 3/4″ high. This design can easily be customized to fit your space
Supplies needed:
6 x 1″ x 4″ x 6 ft pine boards (for bench top)
1 x 2″x 3″x 6 ft stud (Solid wood used for the legs)
Weather proofing stain or paint (Coffee color)
Decking screws (1 1/4″ (14 nos) , 2″ (8 nos))- Keep some extra screws handy
Wood Driller ( Holes can be drilled at the hardware store as well)
Step 1: Cut List
Tip: You can easily get this cut at the hardware store.
Frame (1″x4″): 2 x 55″, 3 x 13 3/4″
Top (1″x4″): 4 x 56″
Legs (2″x3″): 4 x 17″
Step 2: Paint the wood
First coat the wood with a semi-transparent weather proofing paint (Coffee color). Apply the second coat once the first coat is dry.
Step 3: Build the frame
Assemble the frame by first applying some glue on the ends of each frame item, then use corner clamps to hold the frame together as the glue does its job.
To further strengthen the frame, drill two pilot holes and put in screws (use 1 1/4″ screws). After the four sides are put together, add the middle piece (center across the length of the frame) for extra support.
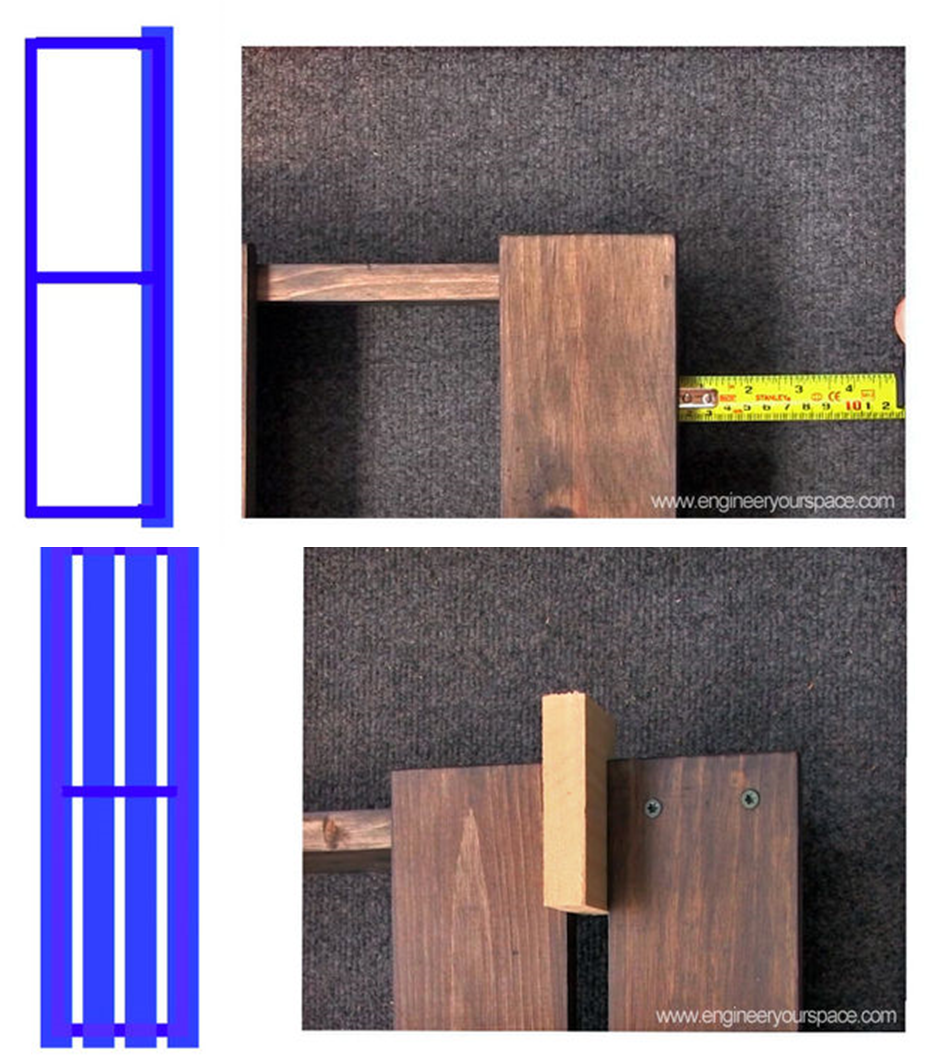
Step 4: Attach the top
Take one of the top planks (1″ x 4″) and place it on top of the frame in such a way that it is 1/2″ past the edge of the frame at the ends and on the sides. Drill pilot holes and screw in place.
Screw in place the remaining pine boards, using a scrap piece of 1″ x 4″ as a spacer.
Step 5: Attach Legs
Repeat for the other pair of legs
Step 6: Customize your DIY wood benches with cushions and privacy panels to make it an ideal outdoor dinning area.
Giving your house a makeover might sound expensive, but there are a few simple yet…
When it comes to thinking of a décor or your dining room, nothing much can…
Ceilings in any house are usually the most neglected part. While you are decking up…
Renovations are not done everyday at home. They are indeed pricey which means that you…
Every house-hold always has that one corner which has an empty look or is a…
Parents of toddlers and expecting parents have one worry all day long on how to…