
FurnishYourself.com: Add some twist to your drab looking walls by doing something novel. Here’s an awesome DIY (Do It Yourself) paint your wall project using zig-zag lines and which will give a lovely look to your rooms.
All you need to do is use some basic measurements, make markings, draw lines, tape them, get on a painting spree and go all out on your creativity with your walls. This goes well for an entrance wall or one section of a wall in your living room or the dining area. It just lifts up the look & feel of your rooms.
Step 1: Supplies
Square cardboard of the size of 6″x 6″
Colorful chalk
Painter’s tape
Painting roller
Step 2: Trace the zig-zag pattern
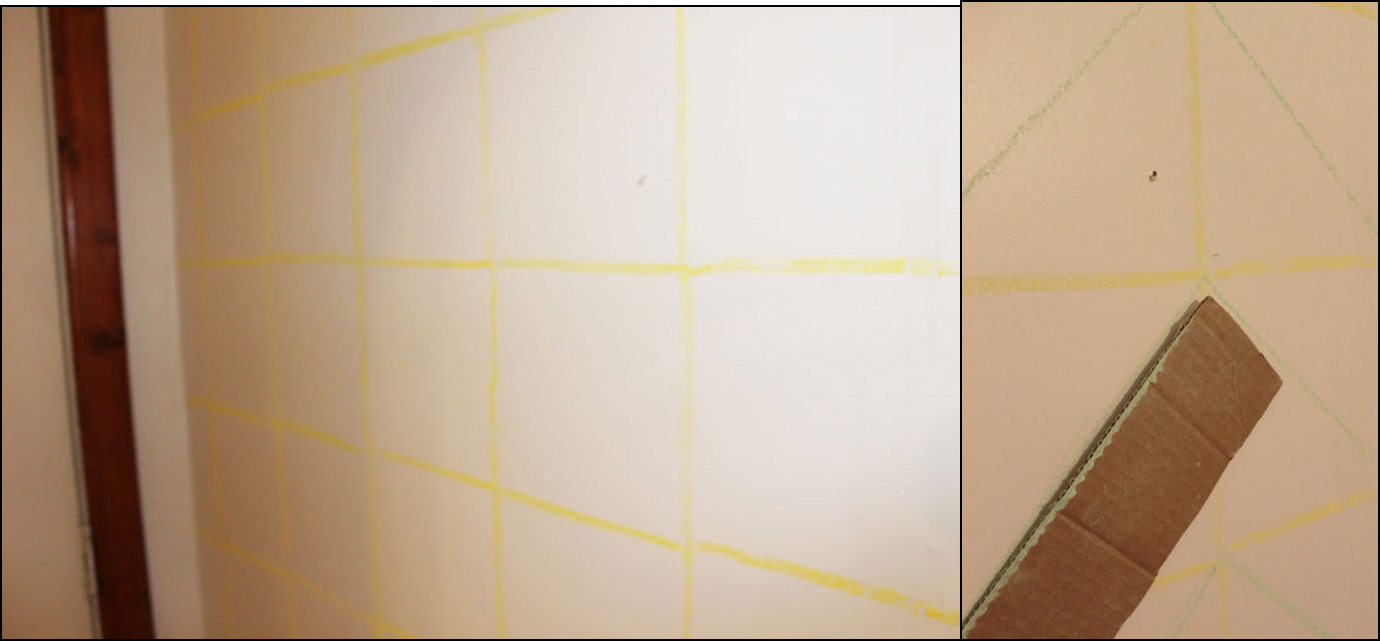
Firstly, measure the entire section of wall you choose to paint and divide it into number of squares and make a neat grid. Use a square cardboard for tracing squares with a colored chalk as shown in the picture making a grid for the entire wall. Then make diagonal lines for every square using a different color chalk. The diagonal lines should be in the opposite direction for the chevron effect.
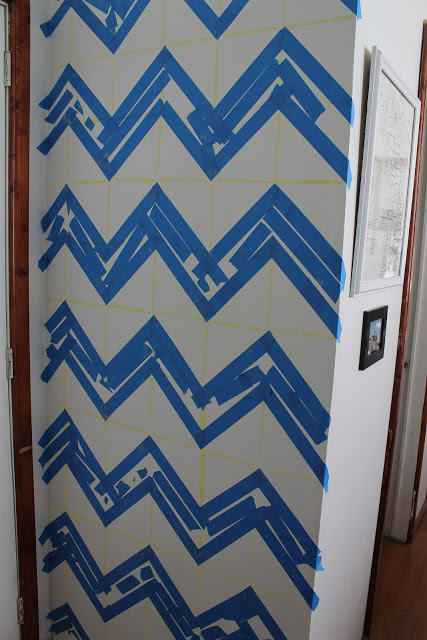
Step 3: Taping & painting the wall
Start taping the wall using painter’s tape on all the diagonal lines. Now it’s time to paint the wall! You can use any combination of colors. The colors chosen here are two different shades of grey giving a clam & poised aura. You can even go for bright & loud colors for your kid’s room.
Its simple to create a wall painting like this. Go ahead and take up a weekend project and unleash all your creativity out on your wall by using different colors, designing different textures and just have some fun!
Photo credits & source: radicalpossibility.com


