
FurnishYourself.com: If you want to encourage your kid to read some more books, you need a nice shelf to hold those books right?Here’s a cute little horse-shaped book shelf for your kids. Make reading time more exciting with such accessories. Just follow these simple DIY (Do It Yourself) steps and surprise your kids!
Step 1: Supplies
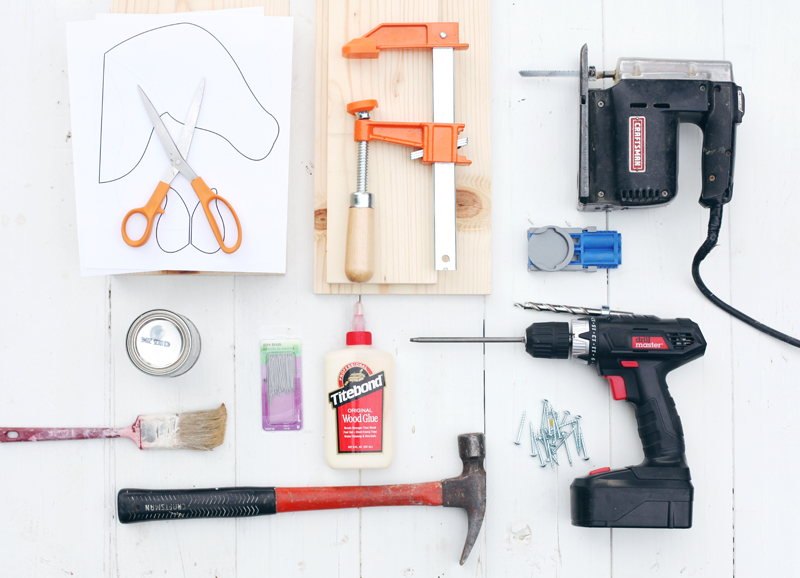
-20 pocket-hole screws
-1″ wire brads (optional)
-wood glue
-8″ x 6′ piece of common board*
-craft plywood (just a small piece)
-120 grit sandpaper (not shown)
-steel wool (optional, but highly suggested)
-tinted wood stain
-printer paper
Tools:
Hammer (optional—for use with wire brads)
Pocket-hole jig with step bit and driver
Two clamps like the one shown
Power drill
Jigsaw with clean cutting blade
Paint brush
Printer (not shown)
Scissors
Pencil (not shown)
Step 2: Cutting out the wood

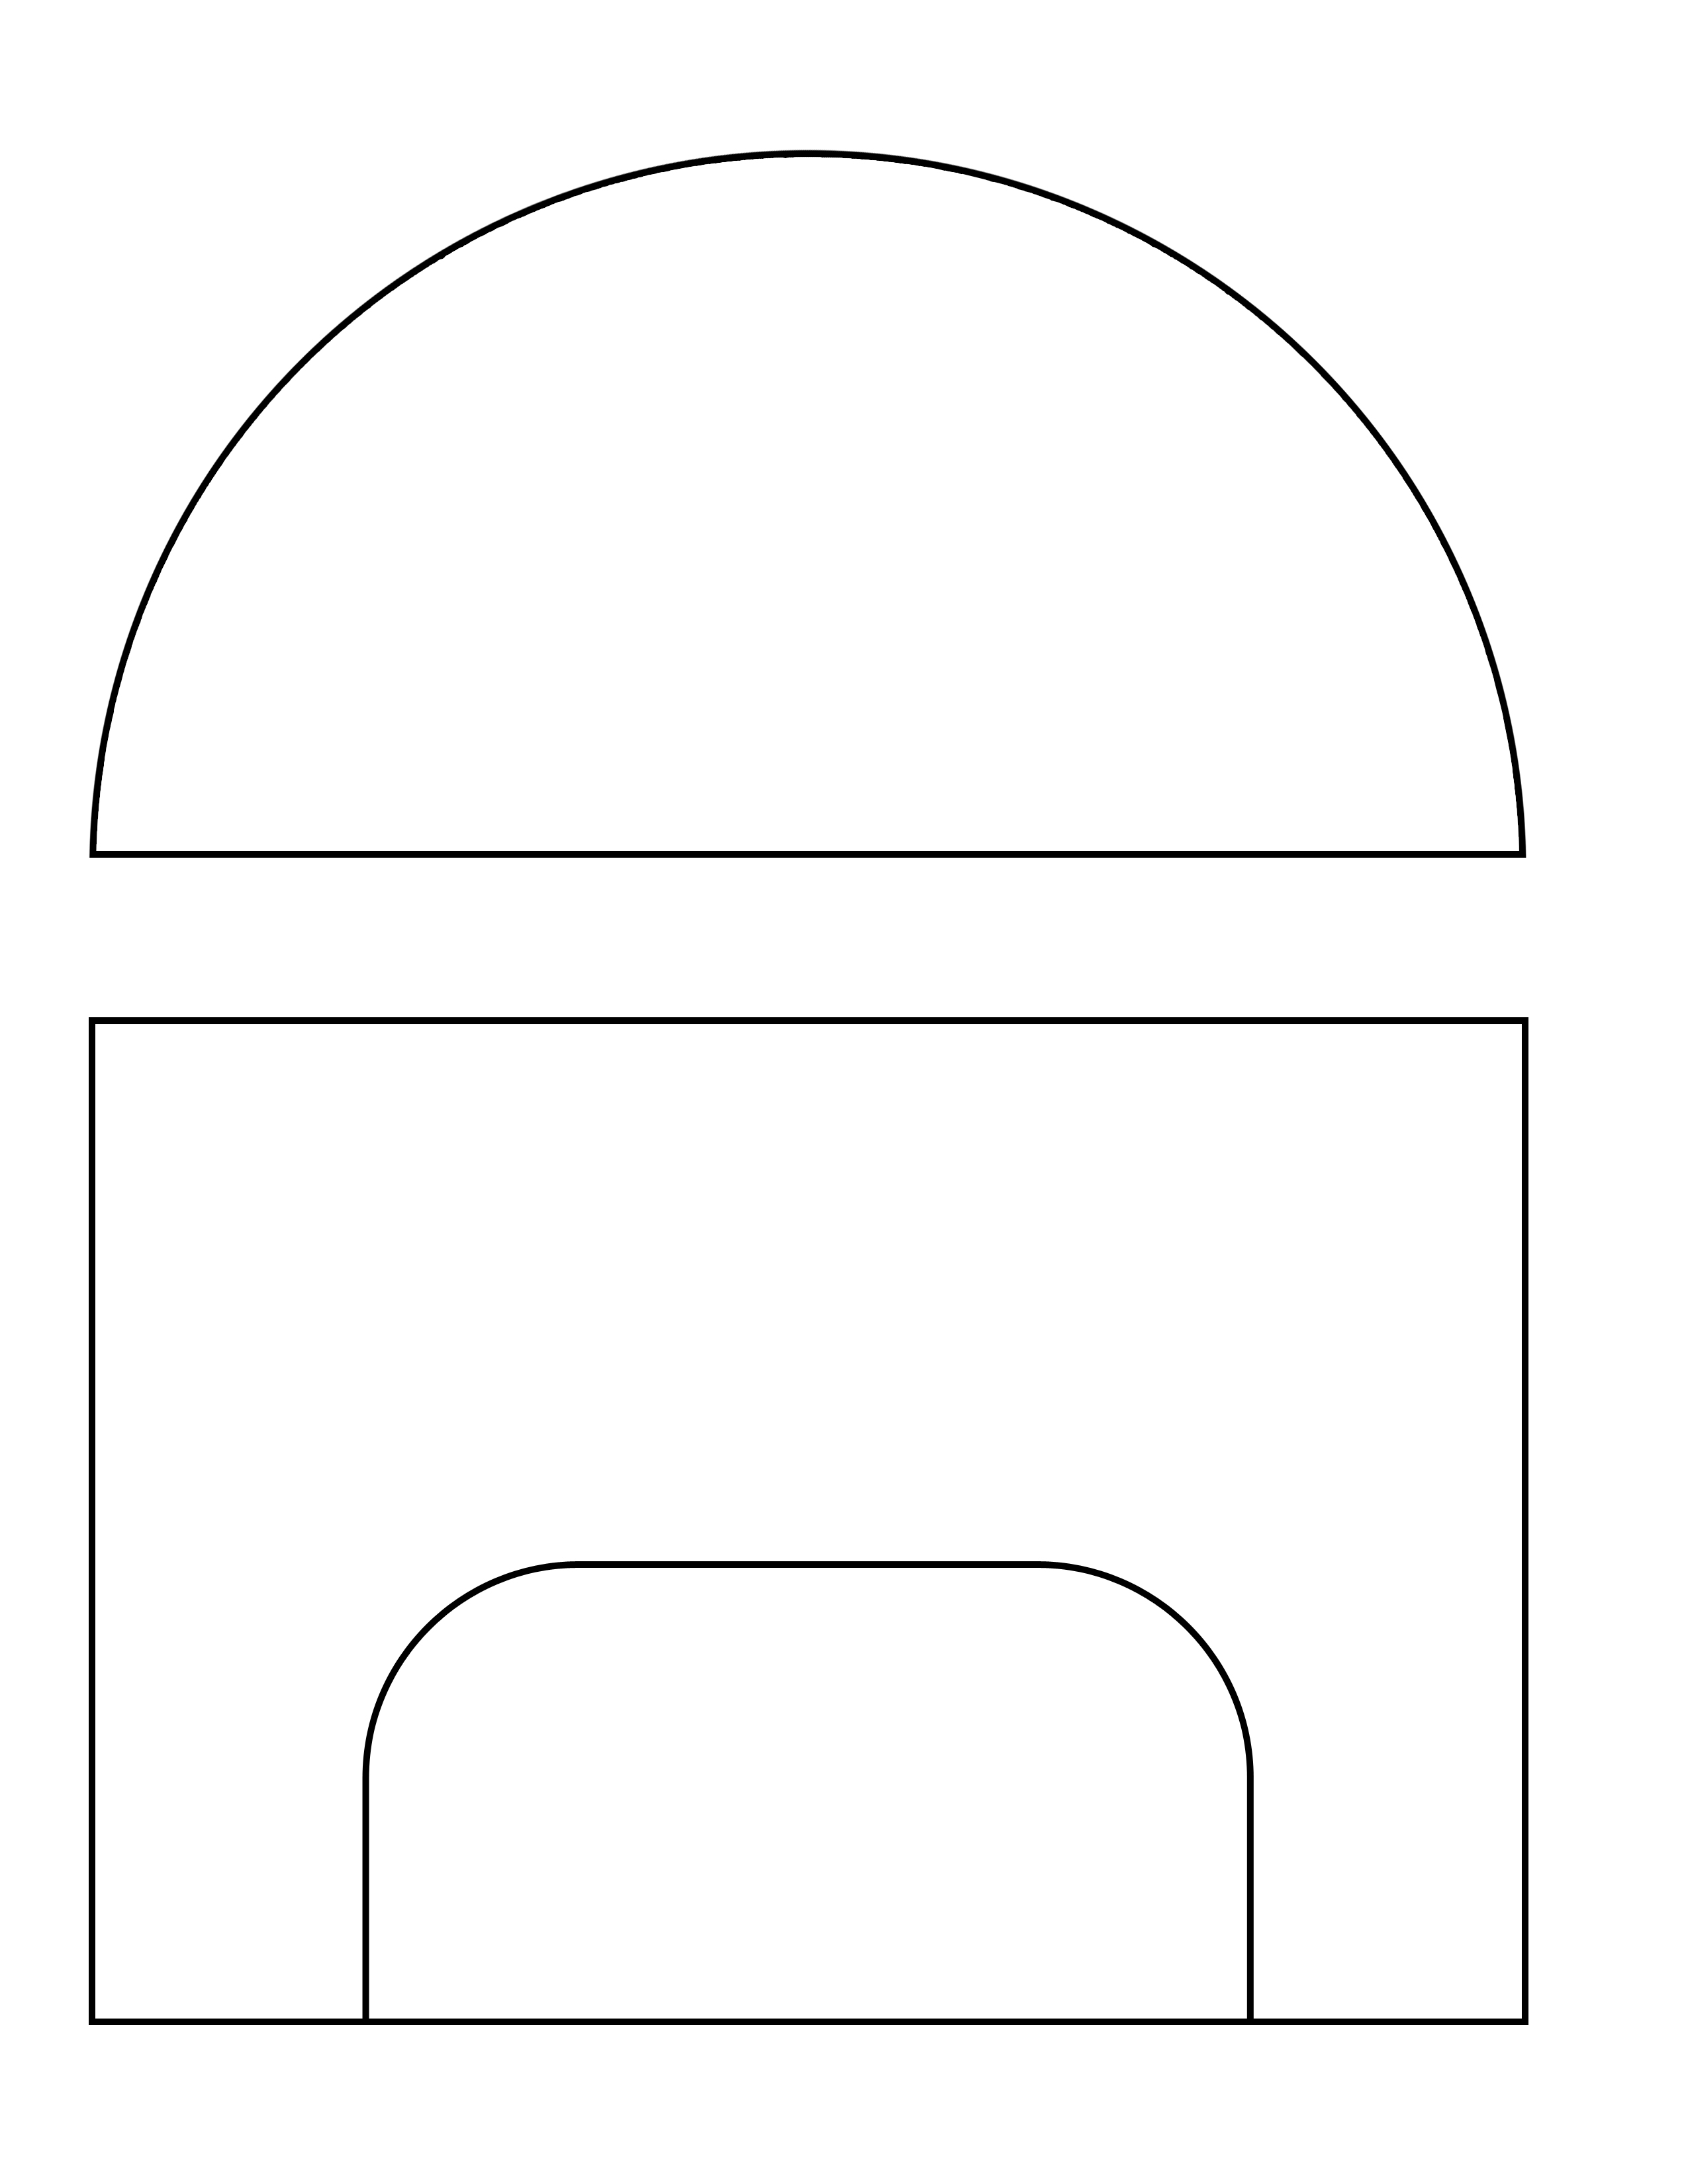
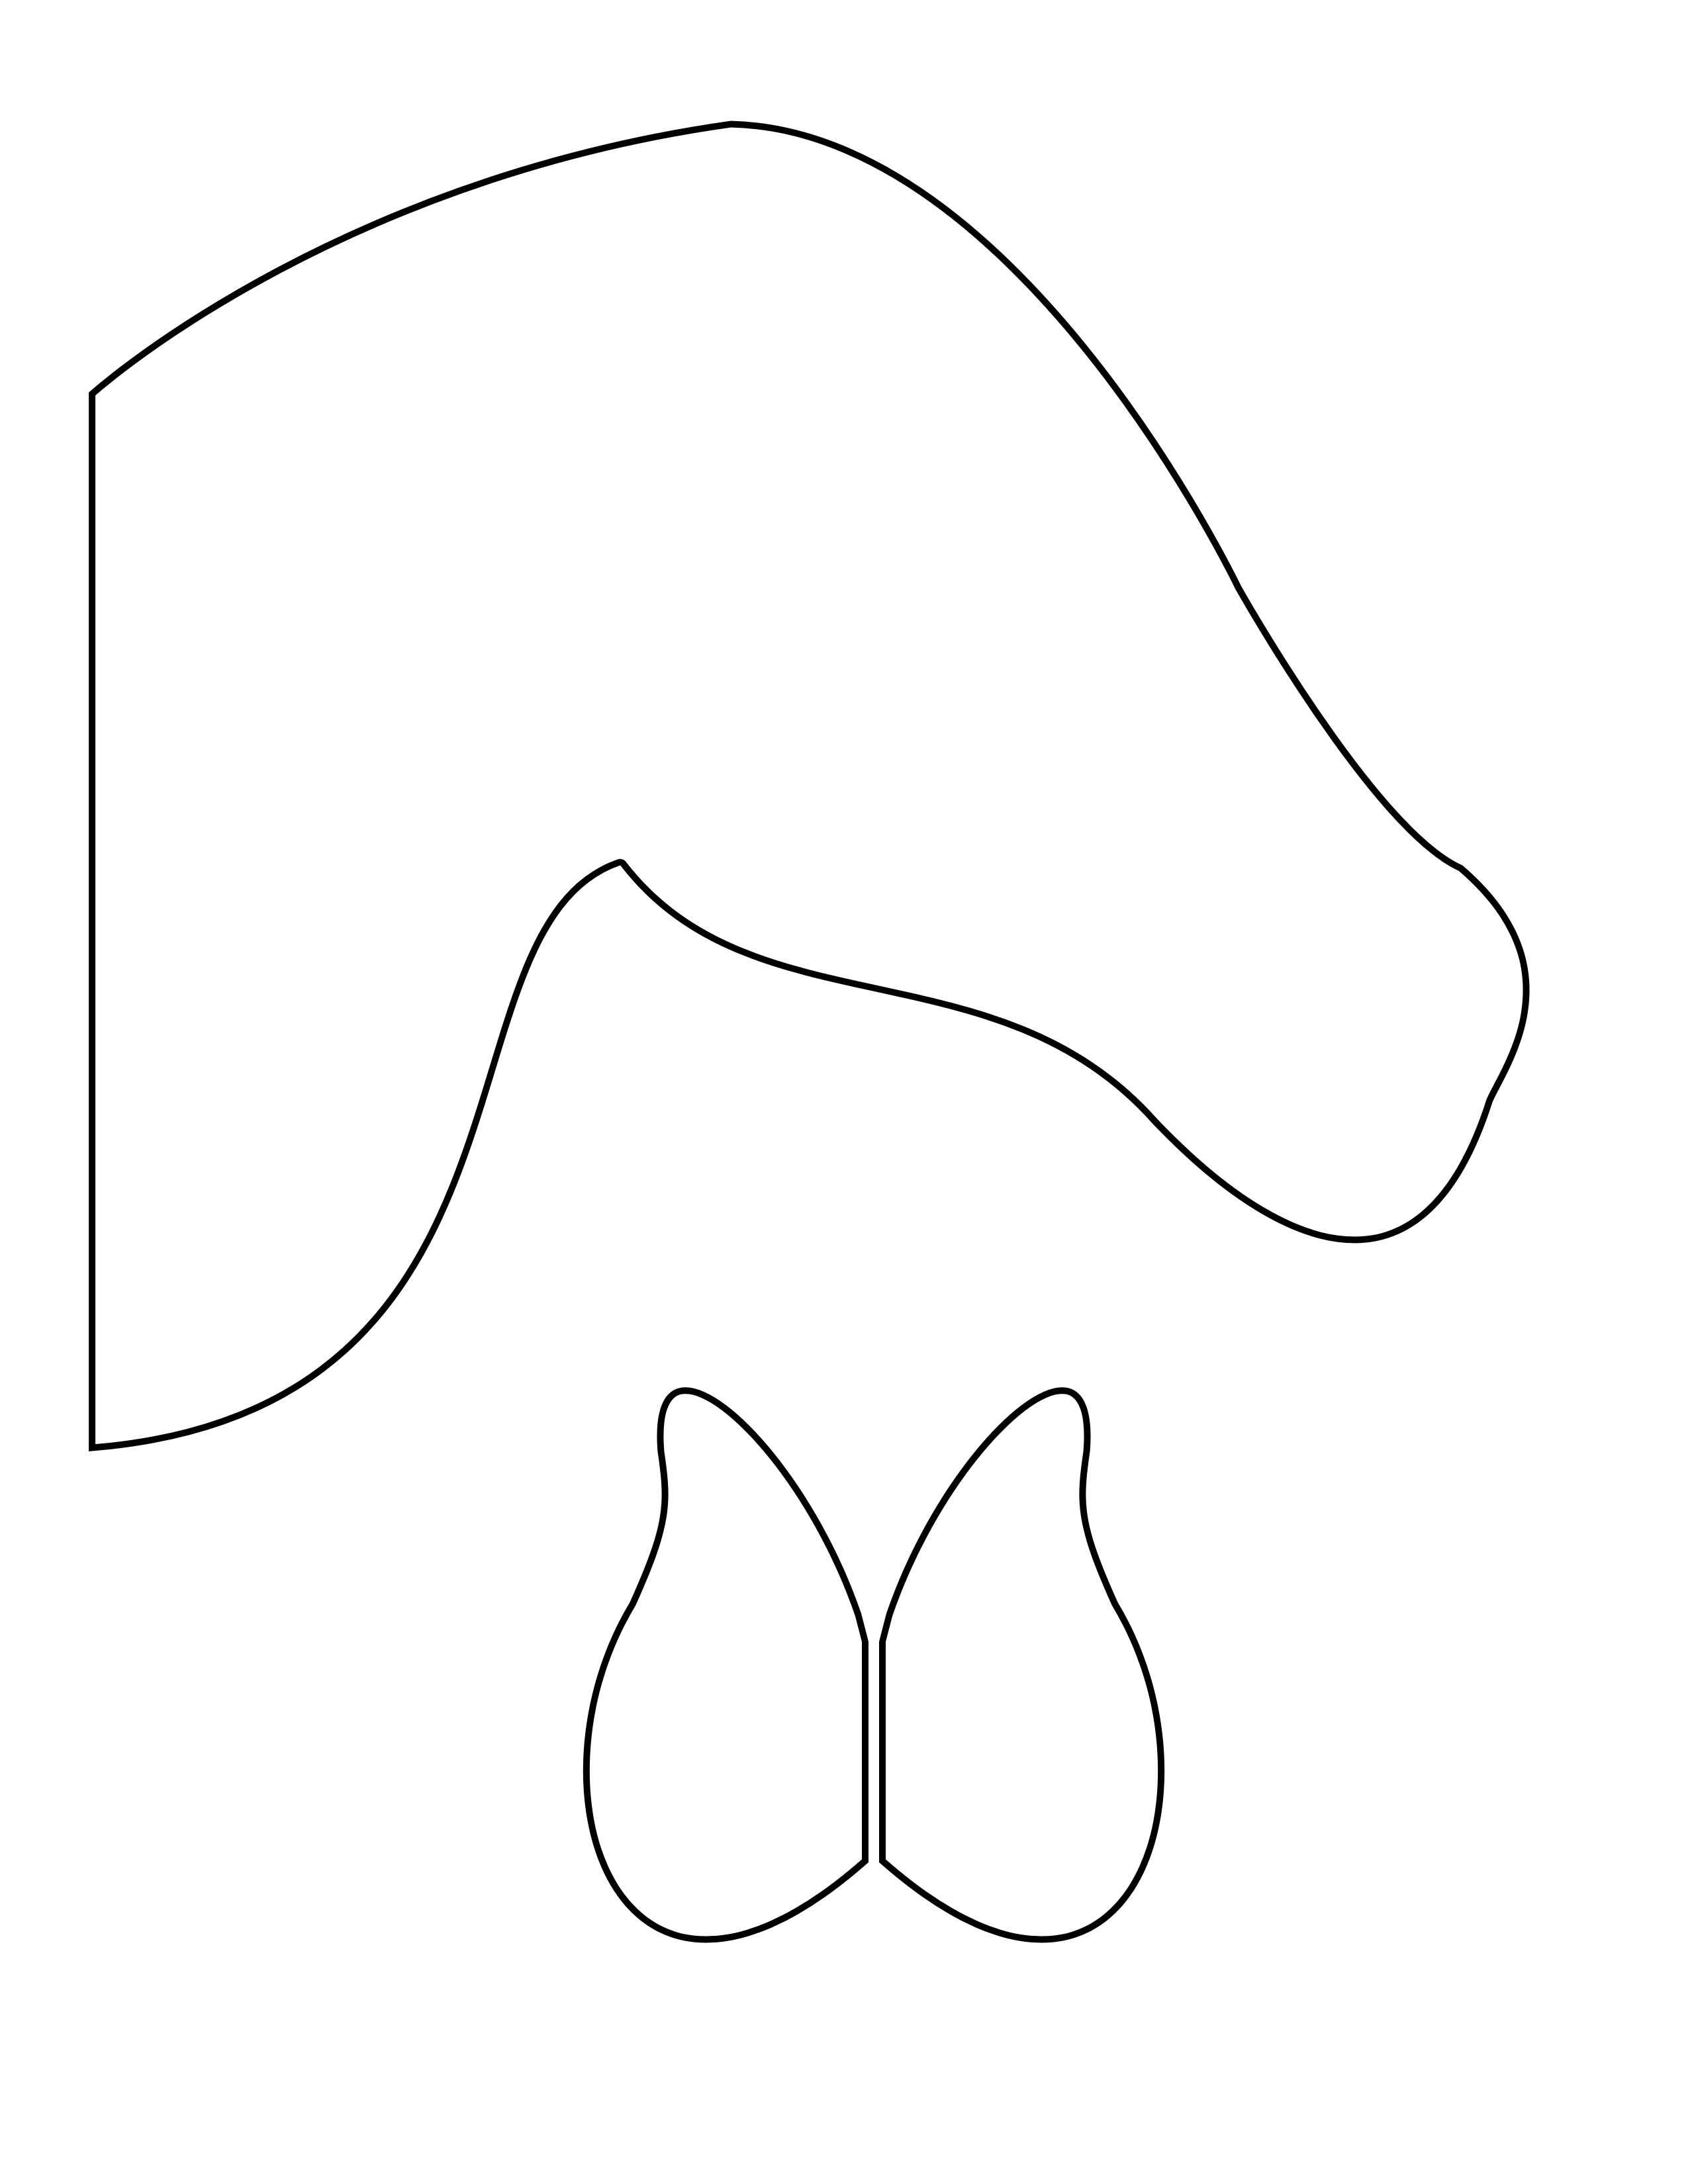
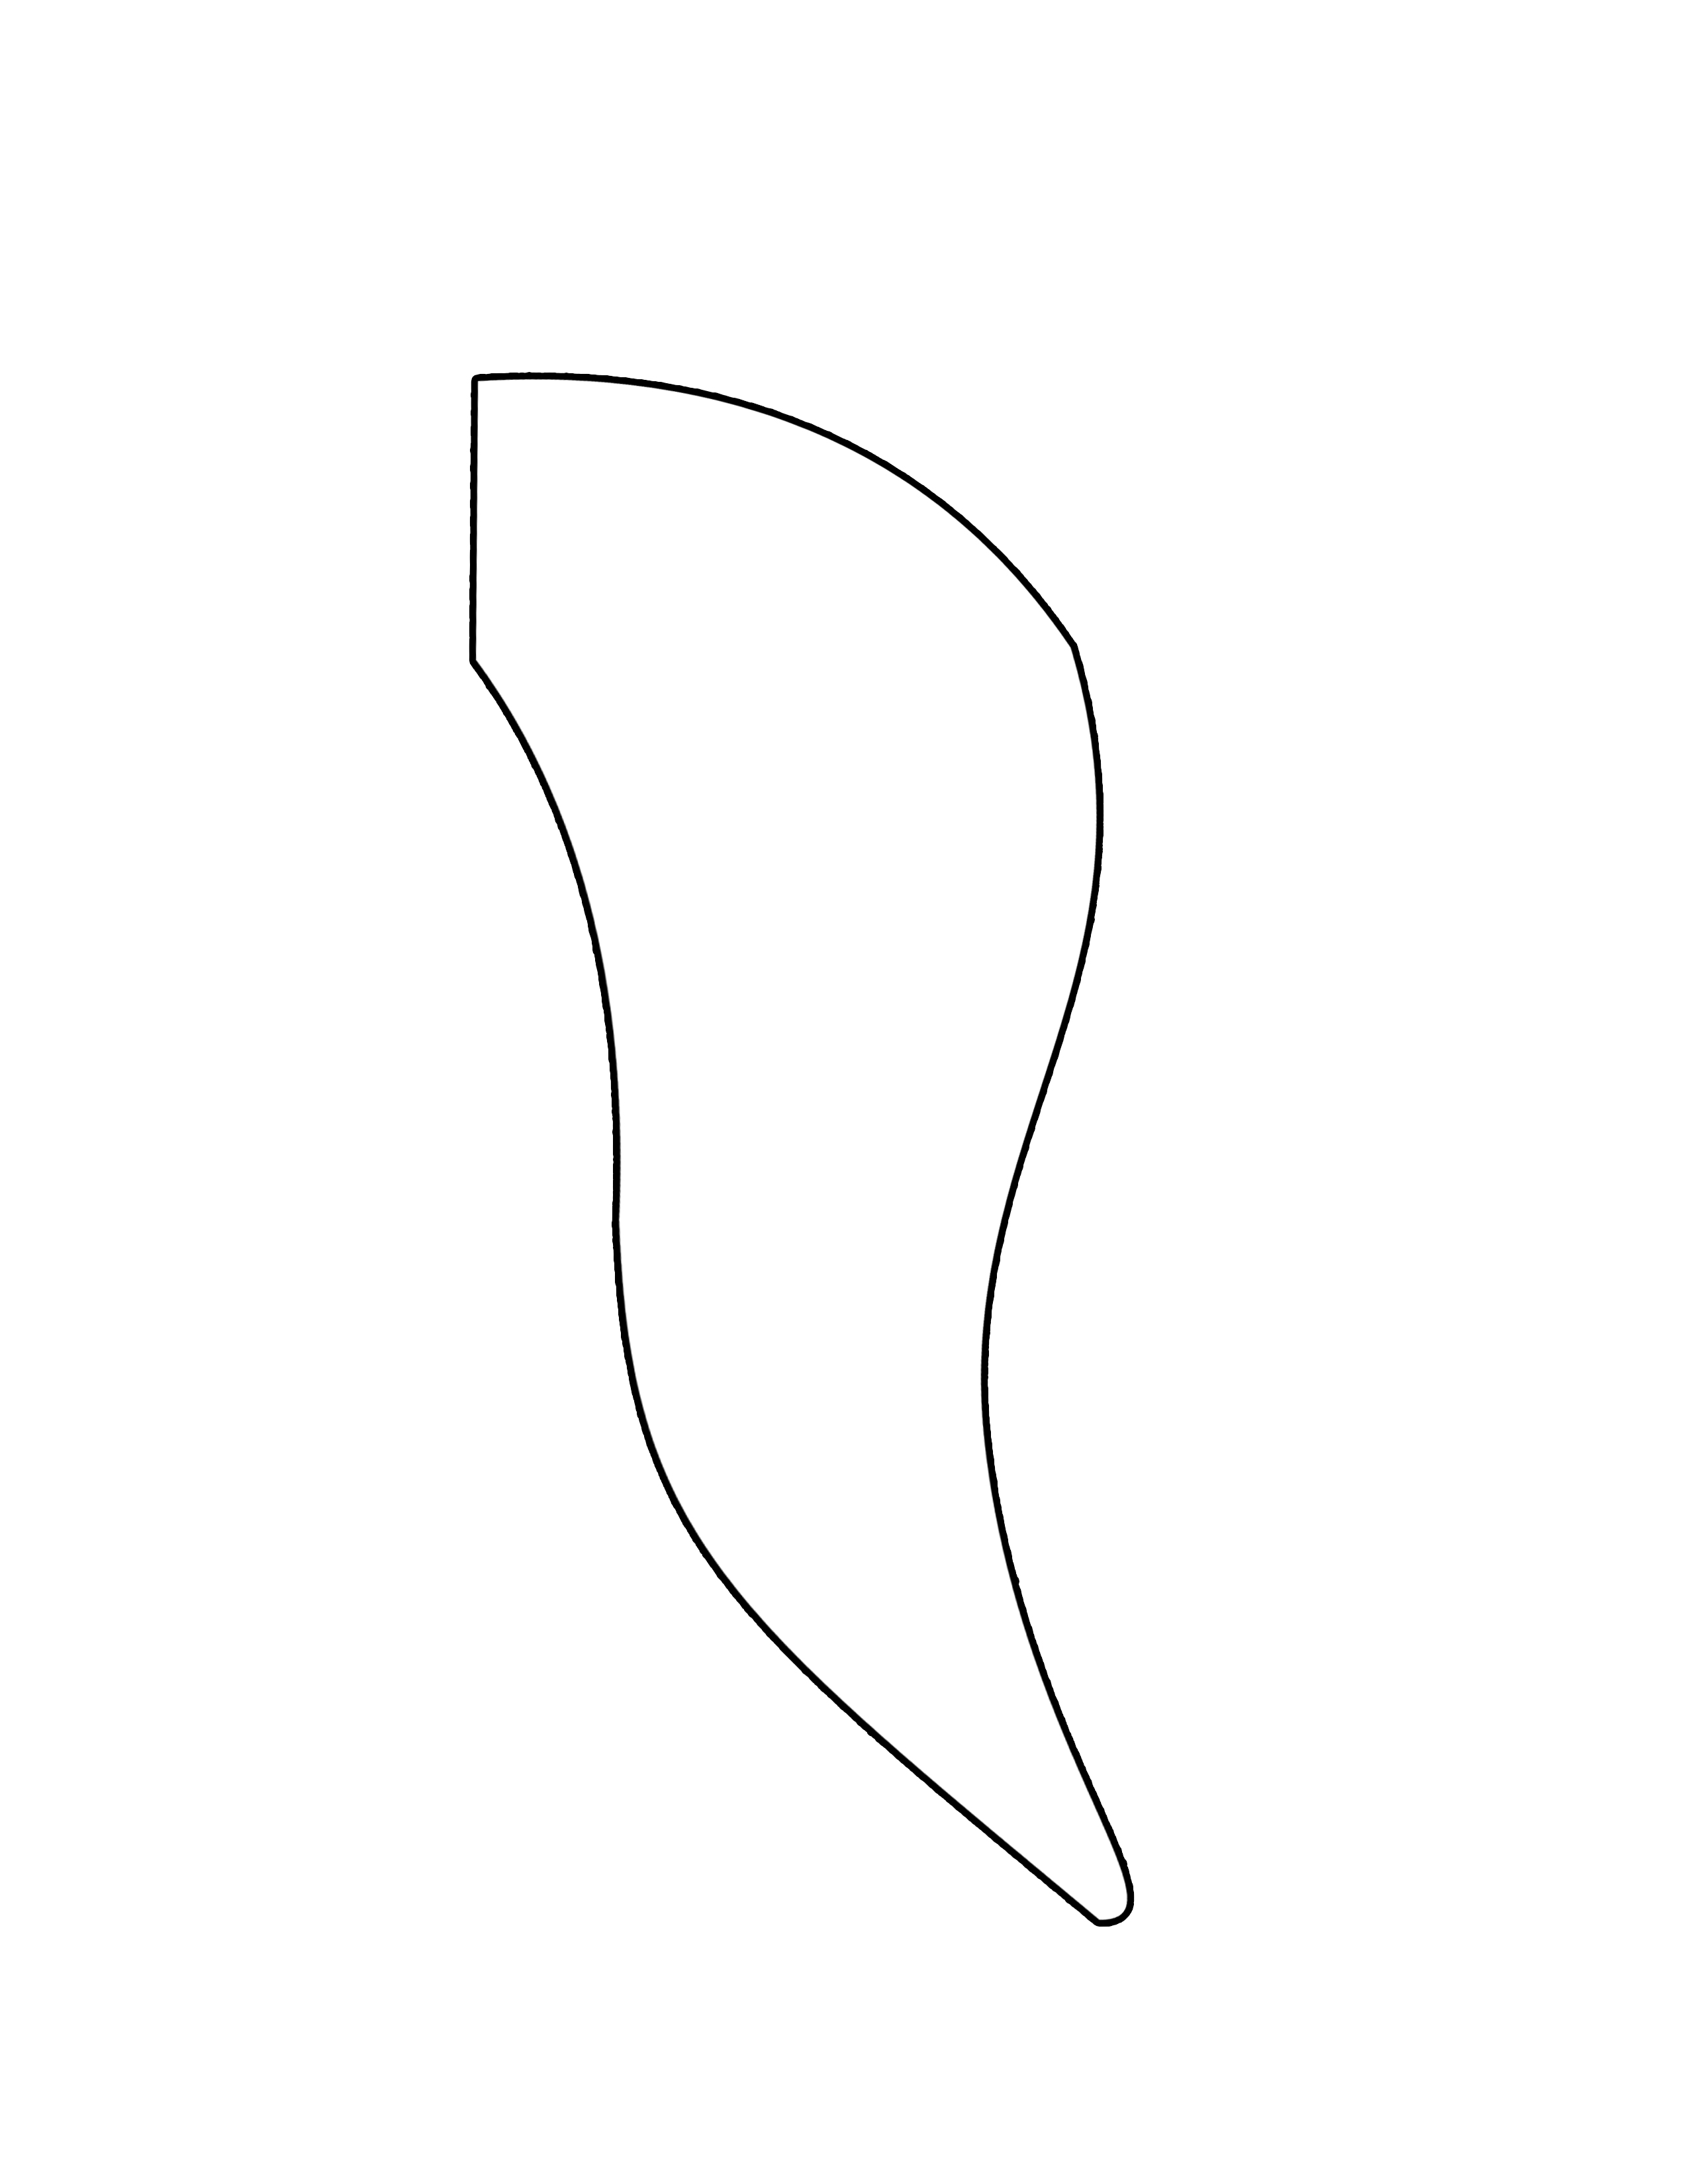
Cut the wood in shapes as shown in the picture above. Here are the templates – one, two, three. Neatly cut the wood using a jigsaw blade. Now sand down the wood to level out uneven surfaces.
Step 3: Painting & putting it together
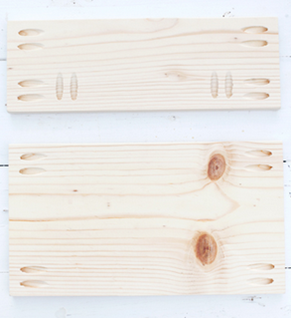
Drill pocket holes on the 14″ length wood pieces as shown above. The narrow piece of wood will be at the back and the wide piece of wood will be at the bottom of the shelf.
Now apply stain on all the pieces of wood and let it dry. It is suggested you brush the dried pieces of wood with steel wool for a smooth finish. Then clamp together the pieces of wood through the pocket holes with the screws.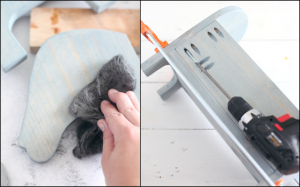
Use glue to stick the head & tail of the horse to the book shelf and allow it to dry. Kids will certainly be fascinated with this horse book shelf.
Photo credits & source : abeautifulmess.com


